Essential Design Elements for Handicap Bathroom Layout

Designing a handicap bathroom requires careful consideration of accessibility and functionality. Beyond just complying with regulations, it’s about creating a space that is comfortable, safe, and empowers individuals with disabilities to live independently.
ADA Compliance in Handicap Bathroom Design
The Americans with Disabilities Act (ADA) sets standards for accessible design, ensuring that individuals with disabilities have equal access to public and private spaces. Compliant design elements include:
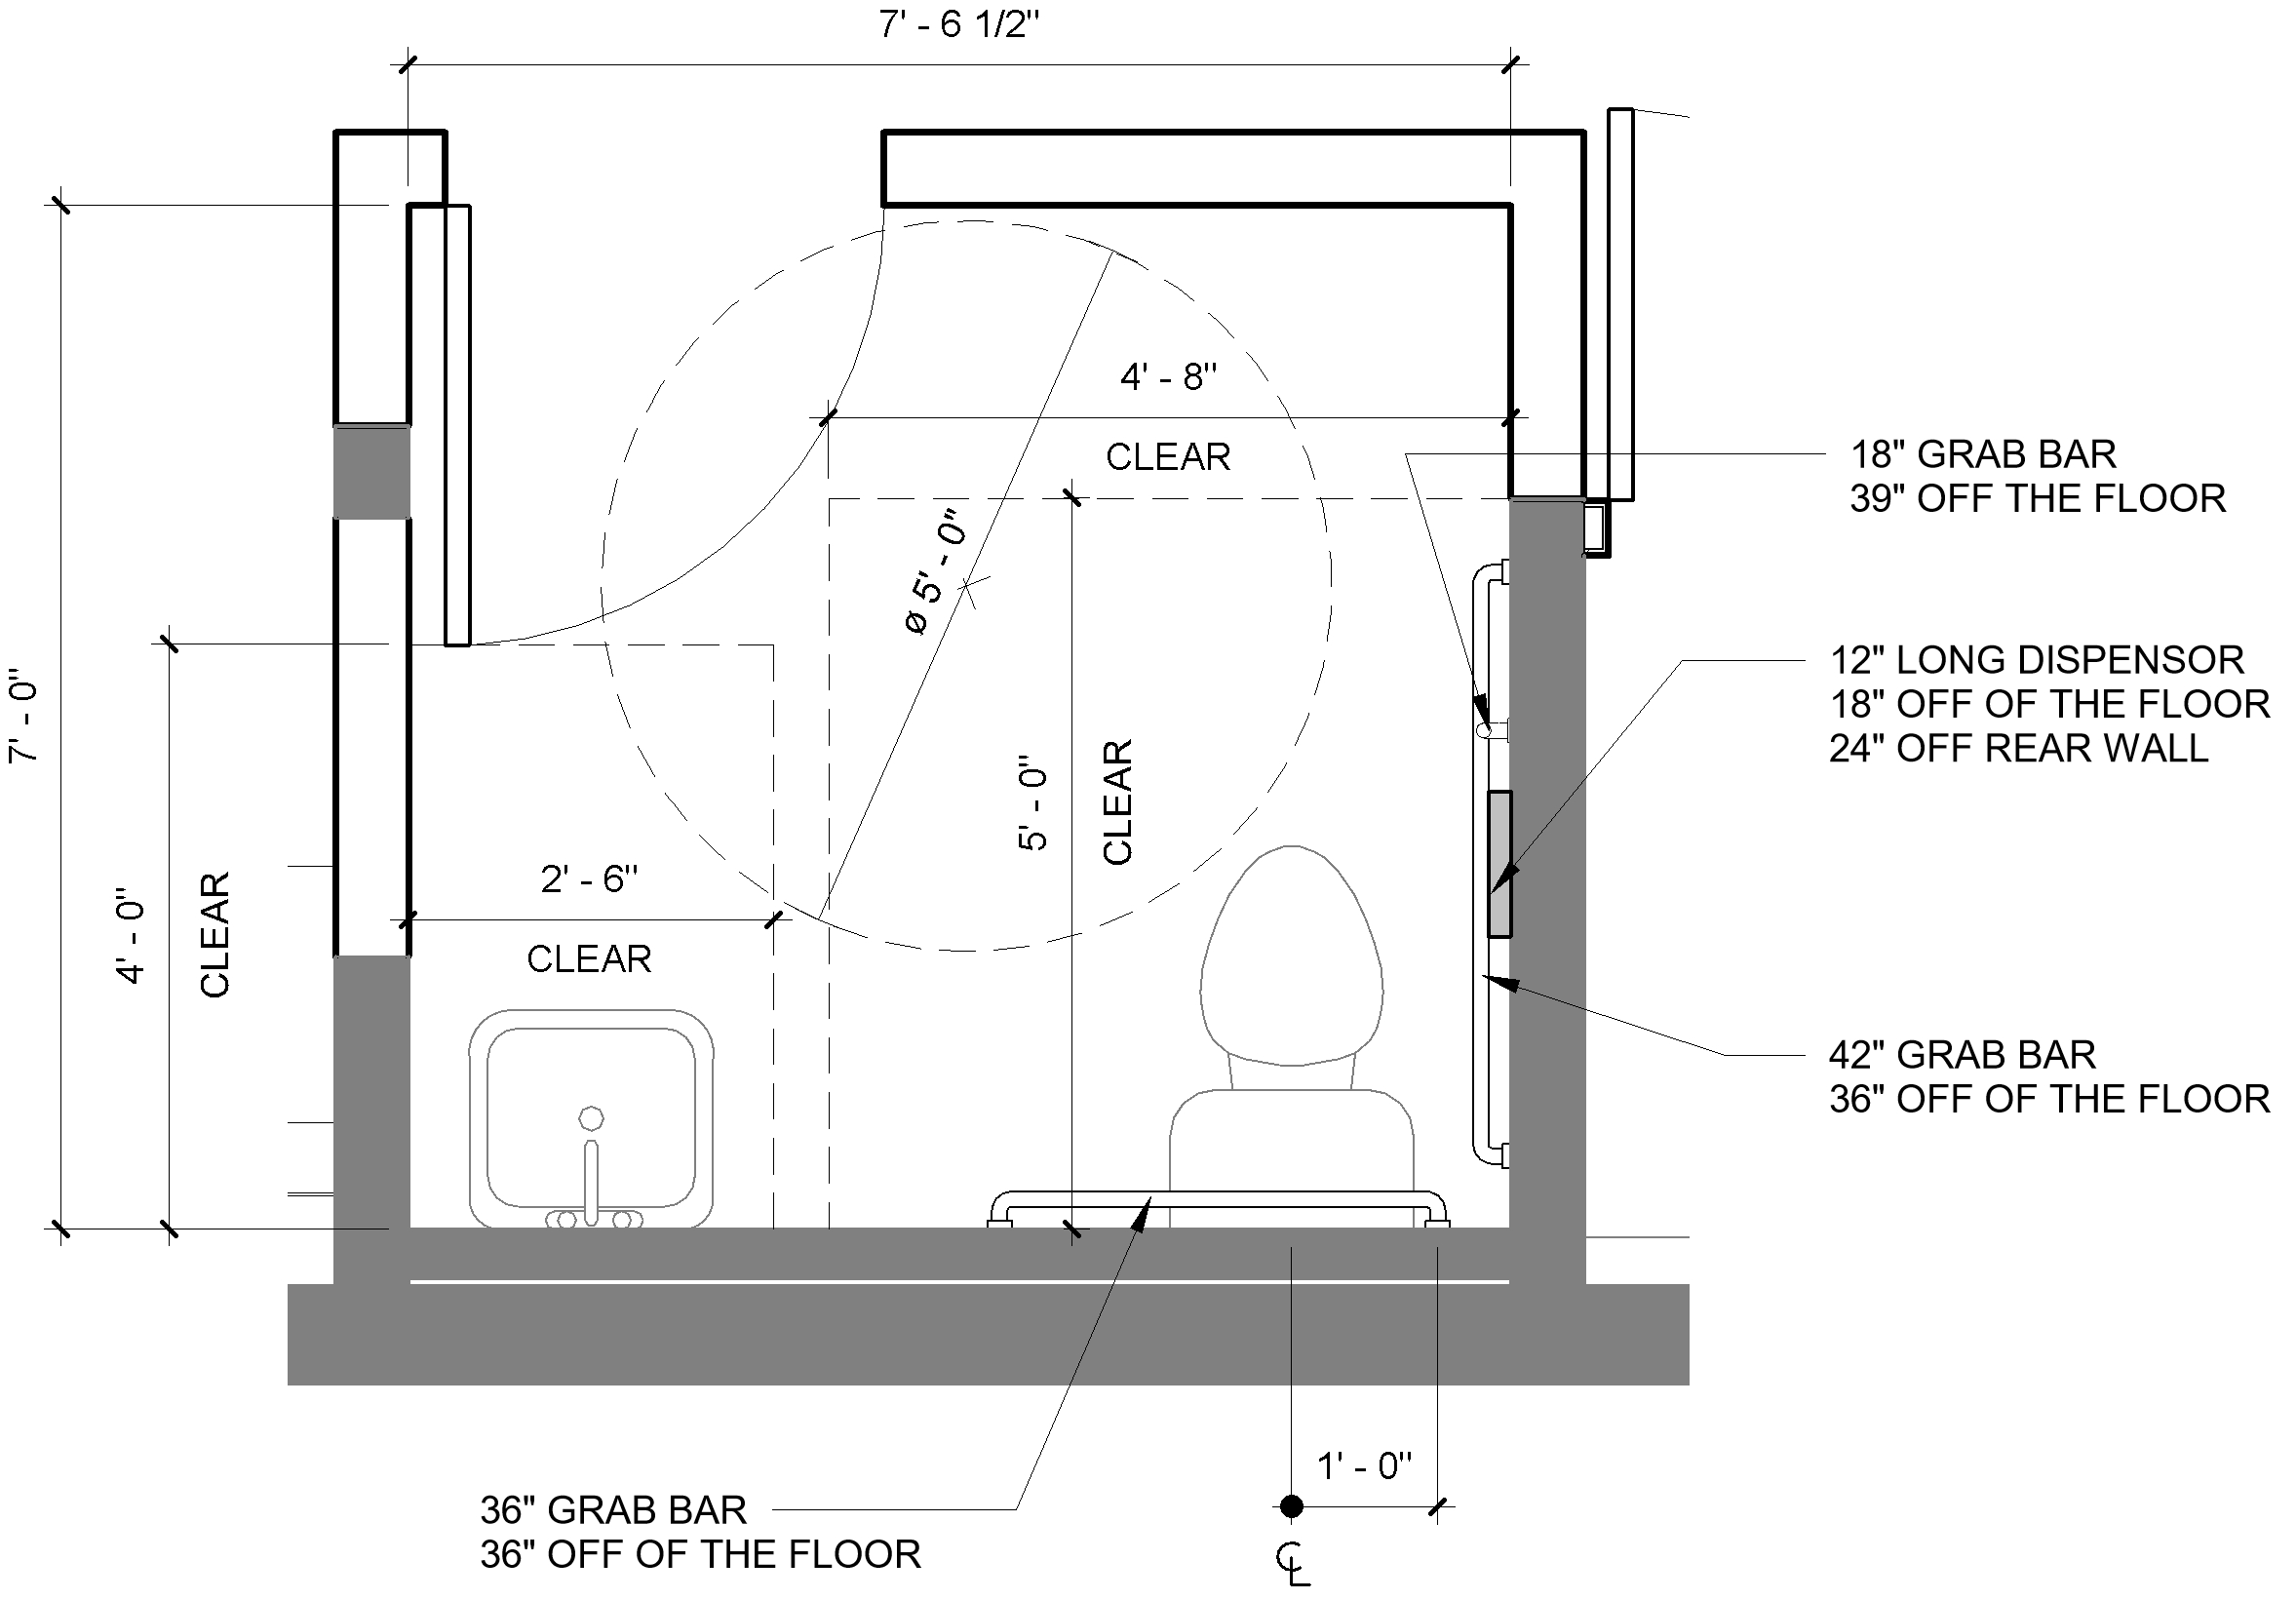
- Minimum Door Width: Doors must be at least 32 inches wide to allow wheelchair access.
- Clear Floor Space: Adequate space around fixtures, like toilets and sinks, is crucial for maneuvering wheelchairs.
- Grab Bars: Strategically placed grab bars provide stability and support for individuals who may need assistance.
- Accessible Sinks: Sinks must be mounted at a height that allows for easy use by wheelchair users.
ADA compliance is not just about following regulations; it’s about creating a welcoming and inclusive environment for all.
Creating a Spacious and Accessible Layout
A well-designed handicap bathroom prioritizes spaciousness and clear pathways for easy navigation.
- Clear Pathways: Pathways should be at least 36 inches wide, allowing ample room for wheelchairs and walkers to maneuver easily.
- Turning Radii: Adequate turning radii, typically 60 inches in diameter, ensure sufficient space for wheelchairs to make 180-degree turns.
- Traffic Flow: The layout should promote a smooth flow of movement, minimizing potential collisions or obstructions.
The Role of Grab Bars
Grab bars play a crucial role in providing stability and support, particularly for individuals with limited mobility.
- Placement Guidelines: Grab bars should be strategically placed near toilets, showers, and tubs, providing secure handholds for getting in and out of these areas.
- Materials: Durable materials like stainless steel or chrome are preferred for their strength and resistance to corrosion.
- Height and Positioning: The height and positioning of grab bars should be carefully considered to ensure they are within easy reach and provide adequate support.
Accessible Toilets and Their Features
| Type | Features |
|---|---|
| Standard Height Toilet | Typically 15-17 inches high, with grab bars for added support. |
| Elevated Toilet | Raised to 17-19 inches, providing easier access for individuals with mobility challenges. |
| Comfort Height Toilet | Similar to elevated toilets, offering a more comfortable height for many users. |
| Bidet Toilet | Combines the functions of a toilet and bidet, offering a more hygienic and comfortable experience. |
Optimizing Functionality and Comfort
A handicap bathroom should not only be accessible but also comfortable and functional for its users. This means incorporating features that cater to individual needs and preferences, enhancing independence and promoting a sense of well-being.
Adjustable Showerheads and Roll-in Showers
Adjustable showerheads provide flexibility in water pressure and height, accommodating users of different physical abilities. A handheld showerhead allows for easier cleaning and control, while a wall-mounted showerhead can be adjusted to the desired height. Roll-in showers, featuring a curbless entry, eliminate barriers and facilitate wheelchair access. These showers are typically designed with a non-slip floor surface for safety and stability.
User-Friendly Sink Designs and Countertop Heights
Sinks designed for wheelchair users often feature a forward-tilted bowl, providing ample clearance for easy access. The countertop height should be between 29 and 34 inches, ensuring comfortable use for wheelchair users.
Non-Slip Flooring and Adequate Lighting, Handicap bathroom layout design
Non-slip flooring is crucial in a handicap bathroom to prevent accidents and falls. Tiles with textured surfaces or rubber mats are recommended. Adequate lighting is essential for safety and visibility. A combination of overhead and task lighting ensures sufficient illumination for all areas of the bathroom.
Visual Representation of a Well-Designed Handicap Bathroom Layout
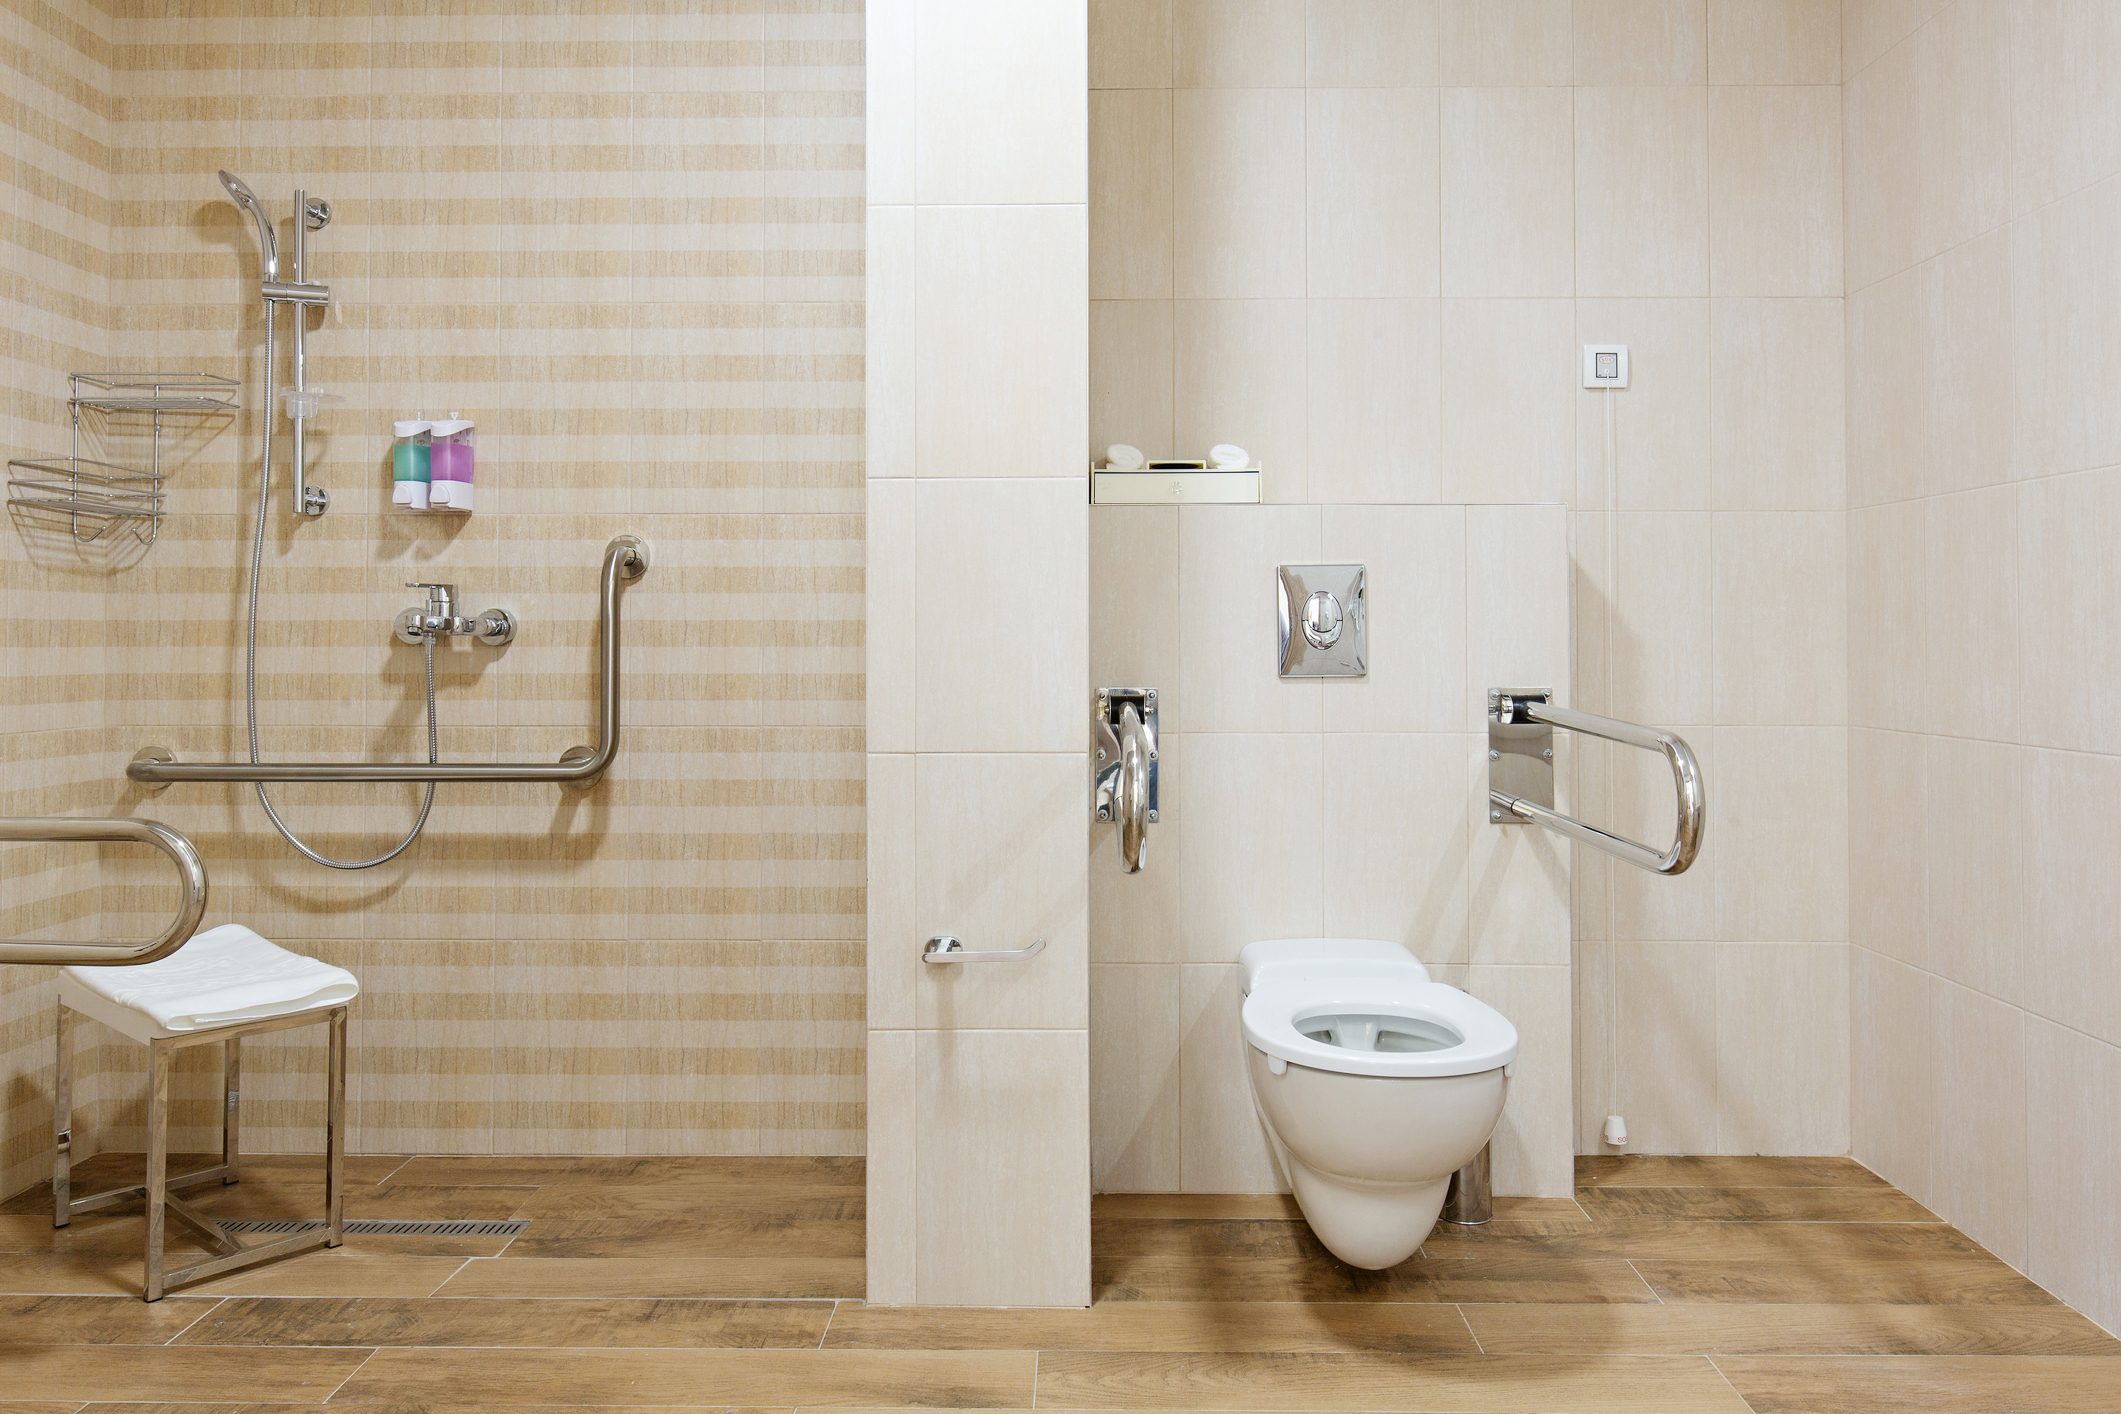
Imagine a bathroom with a spacious layout, featuring a roll-in shower with a non-slip floor surface and a handheld showerhead. The toilet is positioned close to the shower, and a grab bar is installed near the toilet and shower for added support. A sink with a forward-tilted bowl and a countertop height of 32 inches is placed in a corner, allowing for easy access for wheelchair users. The bathroom is well-lit, with both overhead and task lighting. A mirror is mounted at a lower height, and the vanity is designed with a spacious storage area for personal items. This bathroom provides a safe, comfortable, and functional environment for all users.
Beyond the Basics: Handicap Bathroom Layout Design

While meeting ADA guidelines is essential for accessibility, going beyond the basics can significantly enhance the user experience in a handicap bathroom. By incorporating thoughtful design elements and features, we can create spaces that are not only functional but also comfortable, user-friendly, and visually appealing.
Improving Usability with Built-in Storage and Vanity Mirrors
Built-in storage solutions are essential for maximizing space and keeping the bathroom organized. These can include cabinets, shelves, and drawers integrated into the vanity, walls, or even under the sink.
- Easy Access: Placement of these storage elements should prioritize accessibility, ensuring items are within reach of a wheelchair user.
- Clear Visibility: Open shelving or clear containers allow for easy visibility and identification of stored items.
- Space-Saving Solutions: Pull-out shelves, corner cabinets, and vertical storage units can efficiently utilize otherwise wasted space.
Vanity mirrors are a critical element in any bathroom, but in a handicap bathroom, their placement and features are crucial.
- Accessible Height: Mirrors should be mounted at a height that allows wheelchair users to see themselves comfortably.
- Tilting Mechanisms: Consider incorporating tilting mechanisms to provide adjustable viewing angles for users of different heights.
- Magnifying Sections: Adding a magnifying section to the mirror can enhance visibility for users with visual impairments.
Enhancing Visual Clarity with Contrasting Colors and Textures
Creating a visually stimulating and easy-to-navigate bathroom is paramount for users with visual impairments. This can be achieved through the strategic use of contrasting colors and textures.
- High-Contrast Color Schemes: Using bold, contrasting colors for walls, fixtures, and flooring helps to create clear visual boundaries and improve wayfinding. For example, using a light-colored wall with dark-colored trim can clearly define the edges of the space.
- Textured Surfaces: Incorporating textured surfaces like tactile tiles or non-slip flooring can provide additional cues for users with visual impairments. This can be especially helpful in areas like the shower or tub.
- Clear Signage: Installing clear and legible signage, especially in areas like the entrance, toilet, and sink, can guide users around the bathroom.
Designing for Privacy with Frosted Glass Doors or Partitions
Privacy is essential in any bathroom, and it’s particularly important in handicap bathrooms where users may require assistance. Frosted glass doors or partitions can provide a balance between privacy and visual openness.
- Visual Transparency: Frosted glass allows natural light to filter through, creating a brighter and more welcoming space while still offering privacy.
- Safety and Accessibility: Frosted glass doors can also be safer than solid doors, as they allow for visual checks on the user’s well-being.
- Enhanced Aesthetics: Frosted glass can add a touch of elegance and sophistication to the bathroom design.
Maximizing Space and Functionality in Smaller Bathrooms
Small handicap bathrooms present unique challenges, but with creative design solutions, they can be both functional and comfortable.
- Multi-Functional Furniture: Consider using furniture that serves multiple purposes, such as a vanity with built-in storage or a fold-down changing table.
- Space-Saving Fixtures: Compact toilets, wall-mounted sinks, and corner showers can help to maximize floor space.
- Vertical Storage: Utilize vertical space with shelves, cabinets, and storage units to minimize clutter on the floor.
